
- Character State Definition / Components -


Welcome! In this section we will be talking shortly about Character State Modules. Character State Modules are what defines the current State a Character is in. Whether it is in air, in control, attacking and so many other properties are defined in these Blueprints and are reflected in the game as they change the Character's properties and behavior.
We also assume that you previously checked the Tutorials regarding the State Module Basics and Creation.
-
We will be using "Omen_Docs_Char" for this section and its location to the right.
-
While important codes will be in the same folder, there will be files that will be used from the "Omen_Char" itself, especially the animations so keep that in mind!

1- State Definitions Components and Custom Events
As the title implies, State Definitions are the beginning and main visual codes for a State we want our Character to be in. A State Definition consists of a "Custom Event", a "New State Definition" and optional "State Components".
- BASICS -
-
Custom Events are the starters and the Events that are called for to trigger a State Definition and set Character's state to a new one.
-
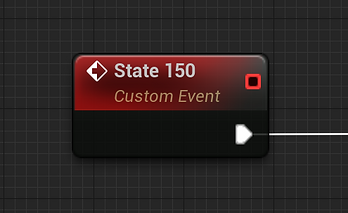
Each Custom Event MUST have a name as "State [Integer]", such as "State 100" as the picture to the right shows or else UF2D can't trigger it via various ways which will be talking about later.
-
If there is more than one Custom Event, same IDs are not allowed. However you can have Custom Events with no limitations name-wise if they are in different State Modules. For example, you can have one "State 100" in a SM Blueprint "A" while having the same name in SM Blueprint "B". However, it is STRONGLY suggested to have different State IDs for every unique State Definition you want to have.
-
UF2D Framework has internal fail-safes to avoid problems that might occur, but you will get false positives if you are wanting to trigger something depending on a State ID if more than one same ID is present for a Character.
----------------------- Inputs -----------------------
-
"State Entry" is the execution input. You will mostly see a Custom Event linked to here so the State starts.
-
"State Name" is an optional variable and has no functionality. Can be left empty.
----- Parameters -----
-
"New State ID" defines the ID of the State Definition it belongs to. It MUST be unique for a Fighter and have the same ID number that the Custom Event mentioned above to avoid confusion.

-
"Character Stance" dropdown got options for "Standing - Crouching - In Air / Flying - Laying Down". It is important to chose the proper Stance which is crucial for Gravity to work properly and/or let Attack Definition put the Fighter into correct State after causing said Fighter receive a hit.
-
"State Type" dropdown got options for "Non-Attack - Attack - Hit Receive - Custom Hit Receive". If a State is passive and not harmful (such as Taunt, Intros) its Type should be "Non-Attack" and "Attack" if vice versa. If the State is something that is meant to be triggered after an attack impact (such as receiving hit to head/stomach) the Type should be "Hit Receive". If it is a Unique Attack Impact situation (such as grabs), Type should be "Custom Hit Receive" as this option disables some UF2D related checks for attack system.
-
"Face to Closest Enemy" makes the Character instantly turn towards the closest Enemy. Who could have guessed?
-
"Move Contact Persist" allows an internal boolean to stay in value "True" after an Attack contacts which normally resets after the State changes. This value can be used to trigger events or used in Input System to be able to trigger moves that are dependent on a previous Attack that needs to connect to a Target first. (Will be implemented properly with examples later.)
----------------------- Outputs -----------------------
-
"Component Entry" is the execution link for adding more State Components if desired which we will be talking about below!
-
State Component nodes are for kickstarting the first values for a State we want our Characters to get in.
-
State Components are optional (with one exception) and can be used at will. Also a State Definition should NOT have more than one of the same Component type.

-
"State Component Entry Gate" node is the one MUST be there before State Addons are started to be used.
-
This little guy is an exception for State Components, as the rest of them are optional, while this one isn't.

- STATE COMPONENTS -
1- Control Adjustment Component
-
This Component Node changes both Movement and Ability Allowance Input values if desired.
-
These values are used in Input State Definitions for preventing or allowing State Triggers easier. They are optional but it is good practice to use them.
-
Example usage can be found in "OmenDocs_Basic_SMs" and this State Module is used in "Basic Example" Input State Definition.
2- Update Animation Component

-
This Component Node can change the Character's Animation. "New Character Animation" is commonly used as in most cases you wouldn't want to change Shadow and Reflection ones as they tend to be hardly visible.
-
There are 2 Extensions that this Component uses as image above shows. "Standard" one allows you to change Fighter's animation to a global animation that all Fighters can have and the values are determined inside "FAnim" (Fighter Animation) Actor Component. "Unique" means we are allowed to have a Flipbook different than what UF2D provides as "Standard".
-
Tag "Main" means we are requesting an animation change on Character's main Flipbook(s). A Character's own flipbook is considered "Main" while Shadow and Reflection ones are considered "Fake". If you drag from "New Shadow Animation" for ex, you will see the Extension's name change to "Unique Fake".
-
"Primary 0" input is for selecting a Flipbook. Currently Characters don't support more than one sprite, so there is only "Primary" option. Later on there will be "Secondary" slots for additional sprites. But for Omen, one is more than enough so let's start preparing an animation!
-
Render Position is used to manually set the Team Render to a new Main Level. In UF2D, Team Objects (Characters, Projectiles etc) rendering depending on the Team ID Value. Render Priority is this; Team 1 > 2 > 3 > 4. This option lets you override this system.
-
Render Priority adjusts which Character in the SAME Team renders first. Value can be between 0 and 10.
-
Example usage can be found in "OmenDocs_Basic_SMs" and this State Module is used in "Basic Example" Input State Definition.
3- Animation Event Component
-
This Component Node can change the Character's Animation. However, unlike the one mentioned above, this one calls for a Custom Event that exists in Character's "FAnim" Actor Component.
-
This one is used mostly for complex Fighters that have different Outfits and will be used later on when doing special attacks such as Throws.

-
Render Position is used to manually set the Team Render to a new Main Level. In UF2D, Team Objects (Characters, Projectiles etc) rendering depending on the Team ID Value. Render Priority is this; Team 1 > 2 > 3 > 4. This option lets you override this system.
-
Render Priority adjusts which Character in the SAME Team renders first. Value can be between 0 and 10.
-
Example usage can be found in "OmenDocs_Basic_SMs" and this State Module is used in "Basic Example" Input State Definition.
4- Movement Adjustment Component
-
This Component Node changes both X and Z Movement Behaviors if desired.
-
Here are what the choices do; "No Changes" skips changing anything. "Stop" completely stops all movement. "Freeze" stops the Movement but does NOT remove Timelines from the system which allows you to let them continue where they left off when "Continue" is selected.

-
Example usage can be found in "OmenDocs_Basic_SMs" and this State Module is used in "Basic Example" Input State Definition.
5- Set X / Z Movement Component

-
This Component Node allows you to let Character change its location in X Axis for certain amount of value and time.
-------- INPUTS --------
--- X Movement Parameters ---
-
"X Movement Behavior" is optional to alter the already active Movement Components and Addons such as this one.
-
"Move Direction" is needed for X Axis Movement to move the Character relative to its own rotation.
-
"Friction Enabled" toggles friction against other Characters. Movement value is reduced to half when this Character pushes against another one.
-
"Timeline Reference", "Movement Links" and "Movement Value" are connections for Timeline Component (We will talk about Timeline Reference and Component soon!). "Movement Value" can not be negative value. If you want Character to go backwards, use "Move Direction" above.
--- Optional Z Movement Parameters ---
-
"Z Movement Behavior" is optional to alter the already active Movement Addons and Components such as this one. This is used so you don't need another Node just to adjust Z Movement.
-------- OUTPUTS --------
-
"Extension Entry" is used by Movement Extensions that are mostly used to change State Module values that trigger when there is a collision against a Wall and such.
-
"Movement Started" can be used if an execution is needed to occur right after this Node starts functioning.
-
"Movement Update" triggers every tick as long as Timeline is still on.
-
"Movement Finished" triggers when Timeline is finished playing.
-
Components like the one above require a Timeline Component to operate. [RMB] click on empty space and type "Add Timeline" to create one. Make sure to link both "Update" and "Finished" links to each other.
-
However making a Timeline is not enough to trigger itself. We also need a reference of it to let the Addon operate it.
-
After giving the Timeline a name, [RMB] in empty space to type its name with "Get in front (ex: Get Stage Pal TL) to get a reference we need to plug it into "Timeline Reference".
-
"Update", "Finished" and "Movement Value" Links are meant for Timeline Outputs.


-
Z Movement Componet does not contain any "Friction against Characters" and "Direction" is determined by the value declared in Timeline itself so we don't need it either. Other than that this Component behaves exactly like like "Set X Movement".
6- Set Gravity Component
-
This Component Node triggers the Gravity System that all Characters contain. It is there to prevent you from constantly creating Z Movement Component or Addons just to get them down to ground after moving in Z+ Direction.
-
You can use an External Gravity to change the way Character goes down and feel free to adjust the Strength in case they need to go down faster or slower.

-
Example usage can be found in "OmenDocs_Basic_SMs" and this State Module is used in "Dash Forward One" Input State Definition.
7- Movement Extensions
-
These Extensions can be linked to "Extension Entry" Output of all Movement Components and Addons.
-
It is very important to define Z Contact State Module Triggers if the Character is going down via Gravity or by other means so Character knows which State to go into once touching to any Stage Object.

-
ZSO and SG refers to "Z State Object" and "Stage Ground". ZSO is mostly not needed unless you got Stage Objects other than Stage Ground that a Character and stand on.
-
XSO, CW and SW refers to "X Stage Object", "Camera Wall" and "Stage Wall". XSO is mostly not needed unless you got Stage Objects other than Stage or Camera Walls.
-
If Character touches any of those States that are assigned to their respectable check parameters, they will change their State to those ones. "-1" value means checks are disabled or ignored.
-
Example usage can be found in "OmenDocs_Basic_SMs" and this State Module is used in "Dash Forward" Input State Definition.
7- State Addon Entry Gate Component
-
"State Component Entry Gate" node is the one MUST be there before State Addons are started to be used.
-
This little guy is an exception for State Components, as the rest of them are optional, while this one isn't.
-
Example usage can be found in "OmenDocs_Basic_SMs" and this State Module is used in "Basic Example" Input State Definition. You will see this one in every State Definition anyways.